-
 @ 266815e0:6cd408a5
2025-05-02 22:24:59
@ 266815e0:6cd408a5
2025-05-02 22:24:59Its been six long months of refactoring code and building out to the applesauce packages but the app is stable enough for another release.
This update is pretty much a full rewrite of the non-visible parts of the app. all the background services were either moved out to the applesauce packages or rewritten, the result is that noStrudel is a little faster and much more consistent with connections and publishing.
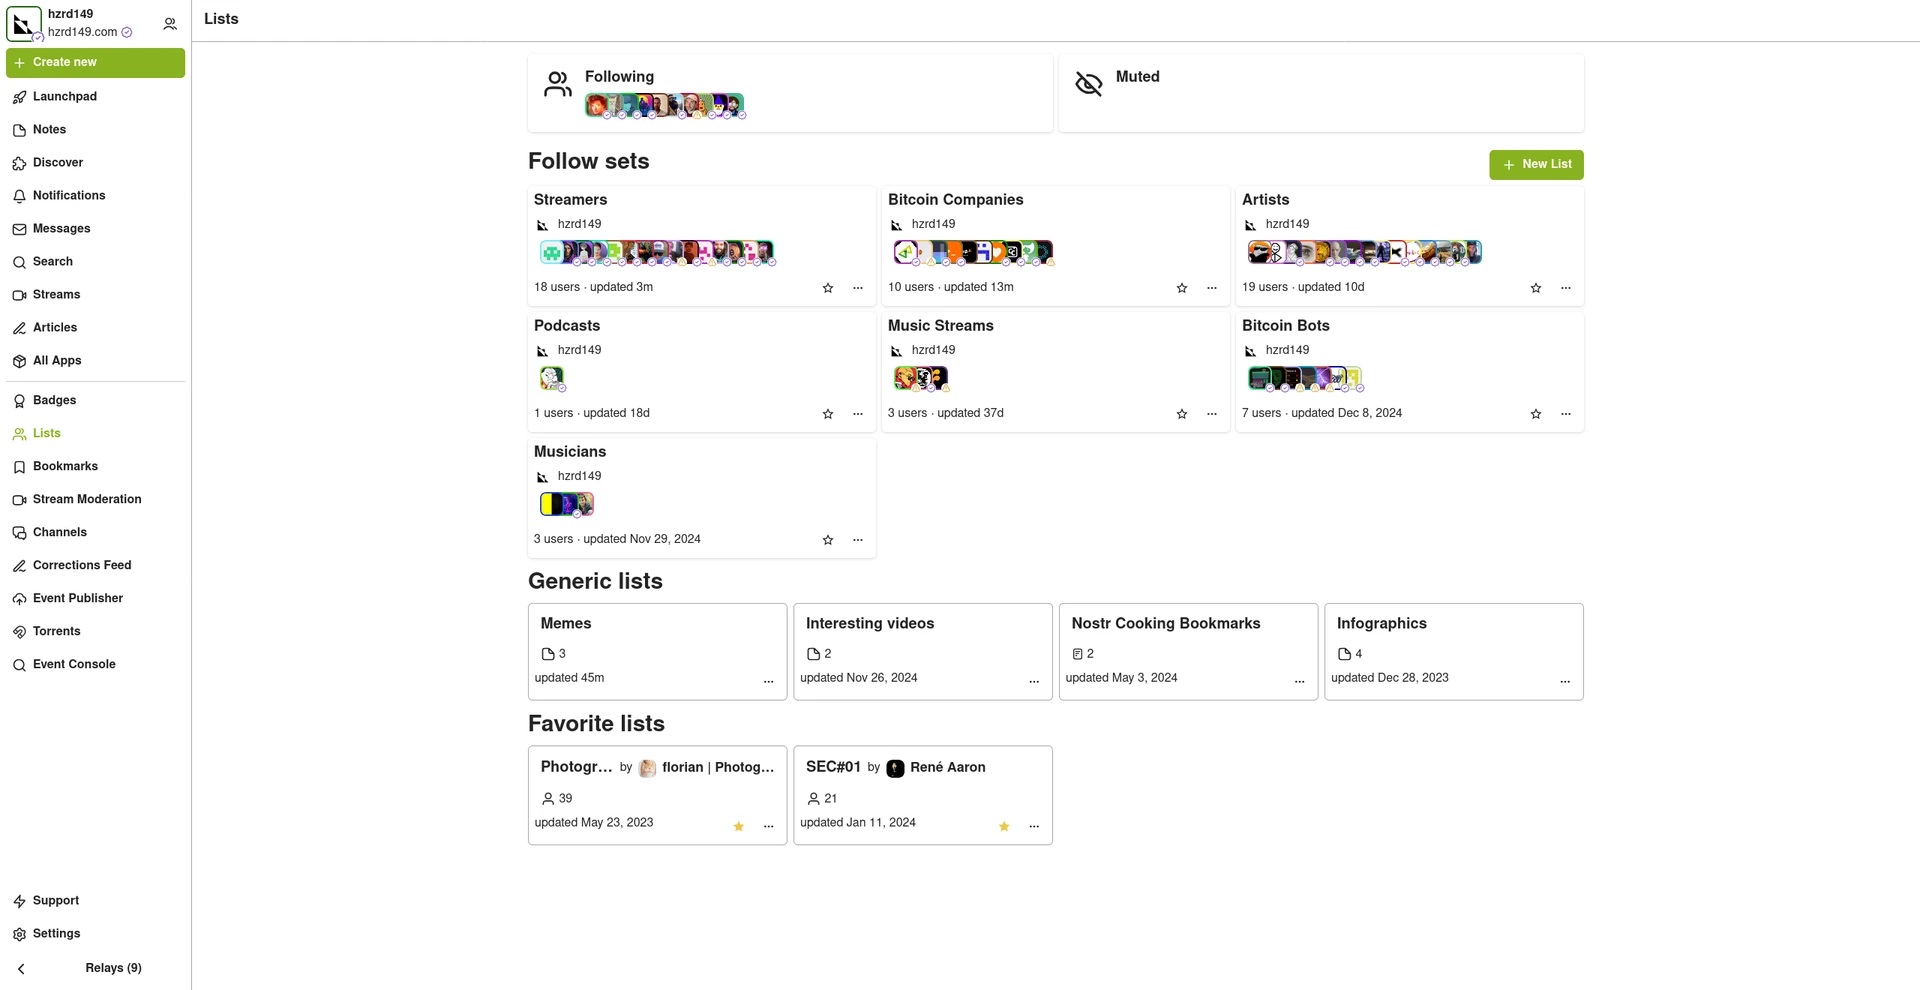
New layout
The app has a new layout now, it takes advantage of the full desktop screen and looks a little better than it did before.
Removed NIP-72 communities
The NIP-72 communities are no longer part of the app, if you want to continue using them there are still a few apps that support them ( like satellite.earth ) but noStrudel won't support them going forward.
The communities where interesting but ultimately proved too have some fundamental flaws, most notably that all posts had to be approved by a moderator. There were some good ideas on how to improve it but they would have only been patches and wouldn't have fixed the underlying issues.
I wont promise to build it into noStrudel, but NIP-29 (relay based groups) look a lot more promising and already have better moderation abilities then NIP-72 communities could ever have.
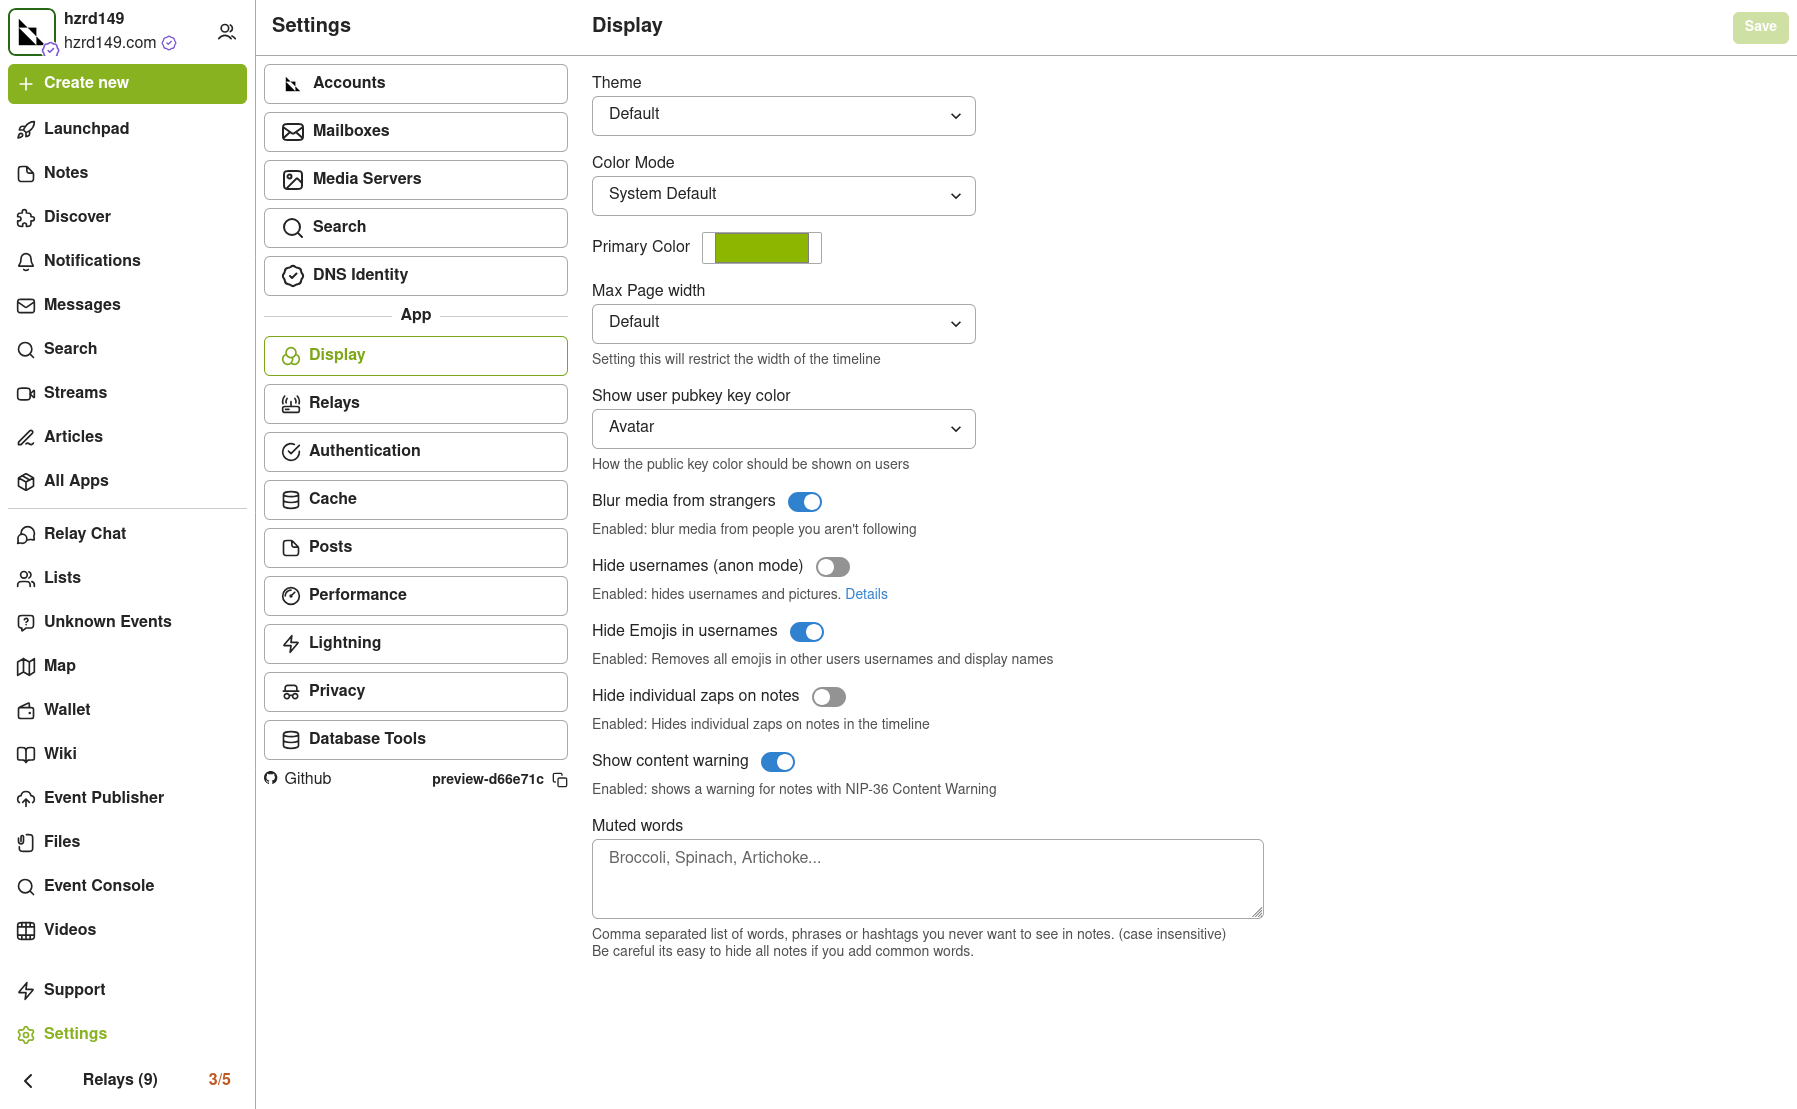
Settings view
There is now a dedicated settings view, so no more hunting around for where the relays are set or trying to find how to add another account. its all in one place now
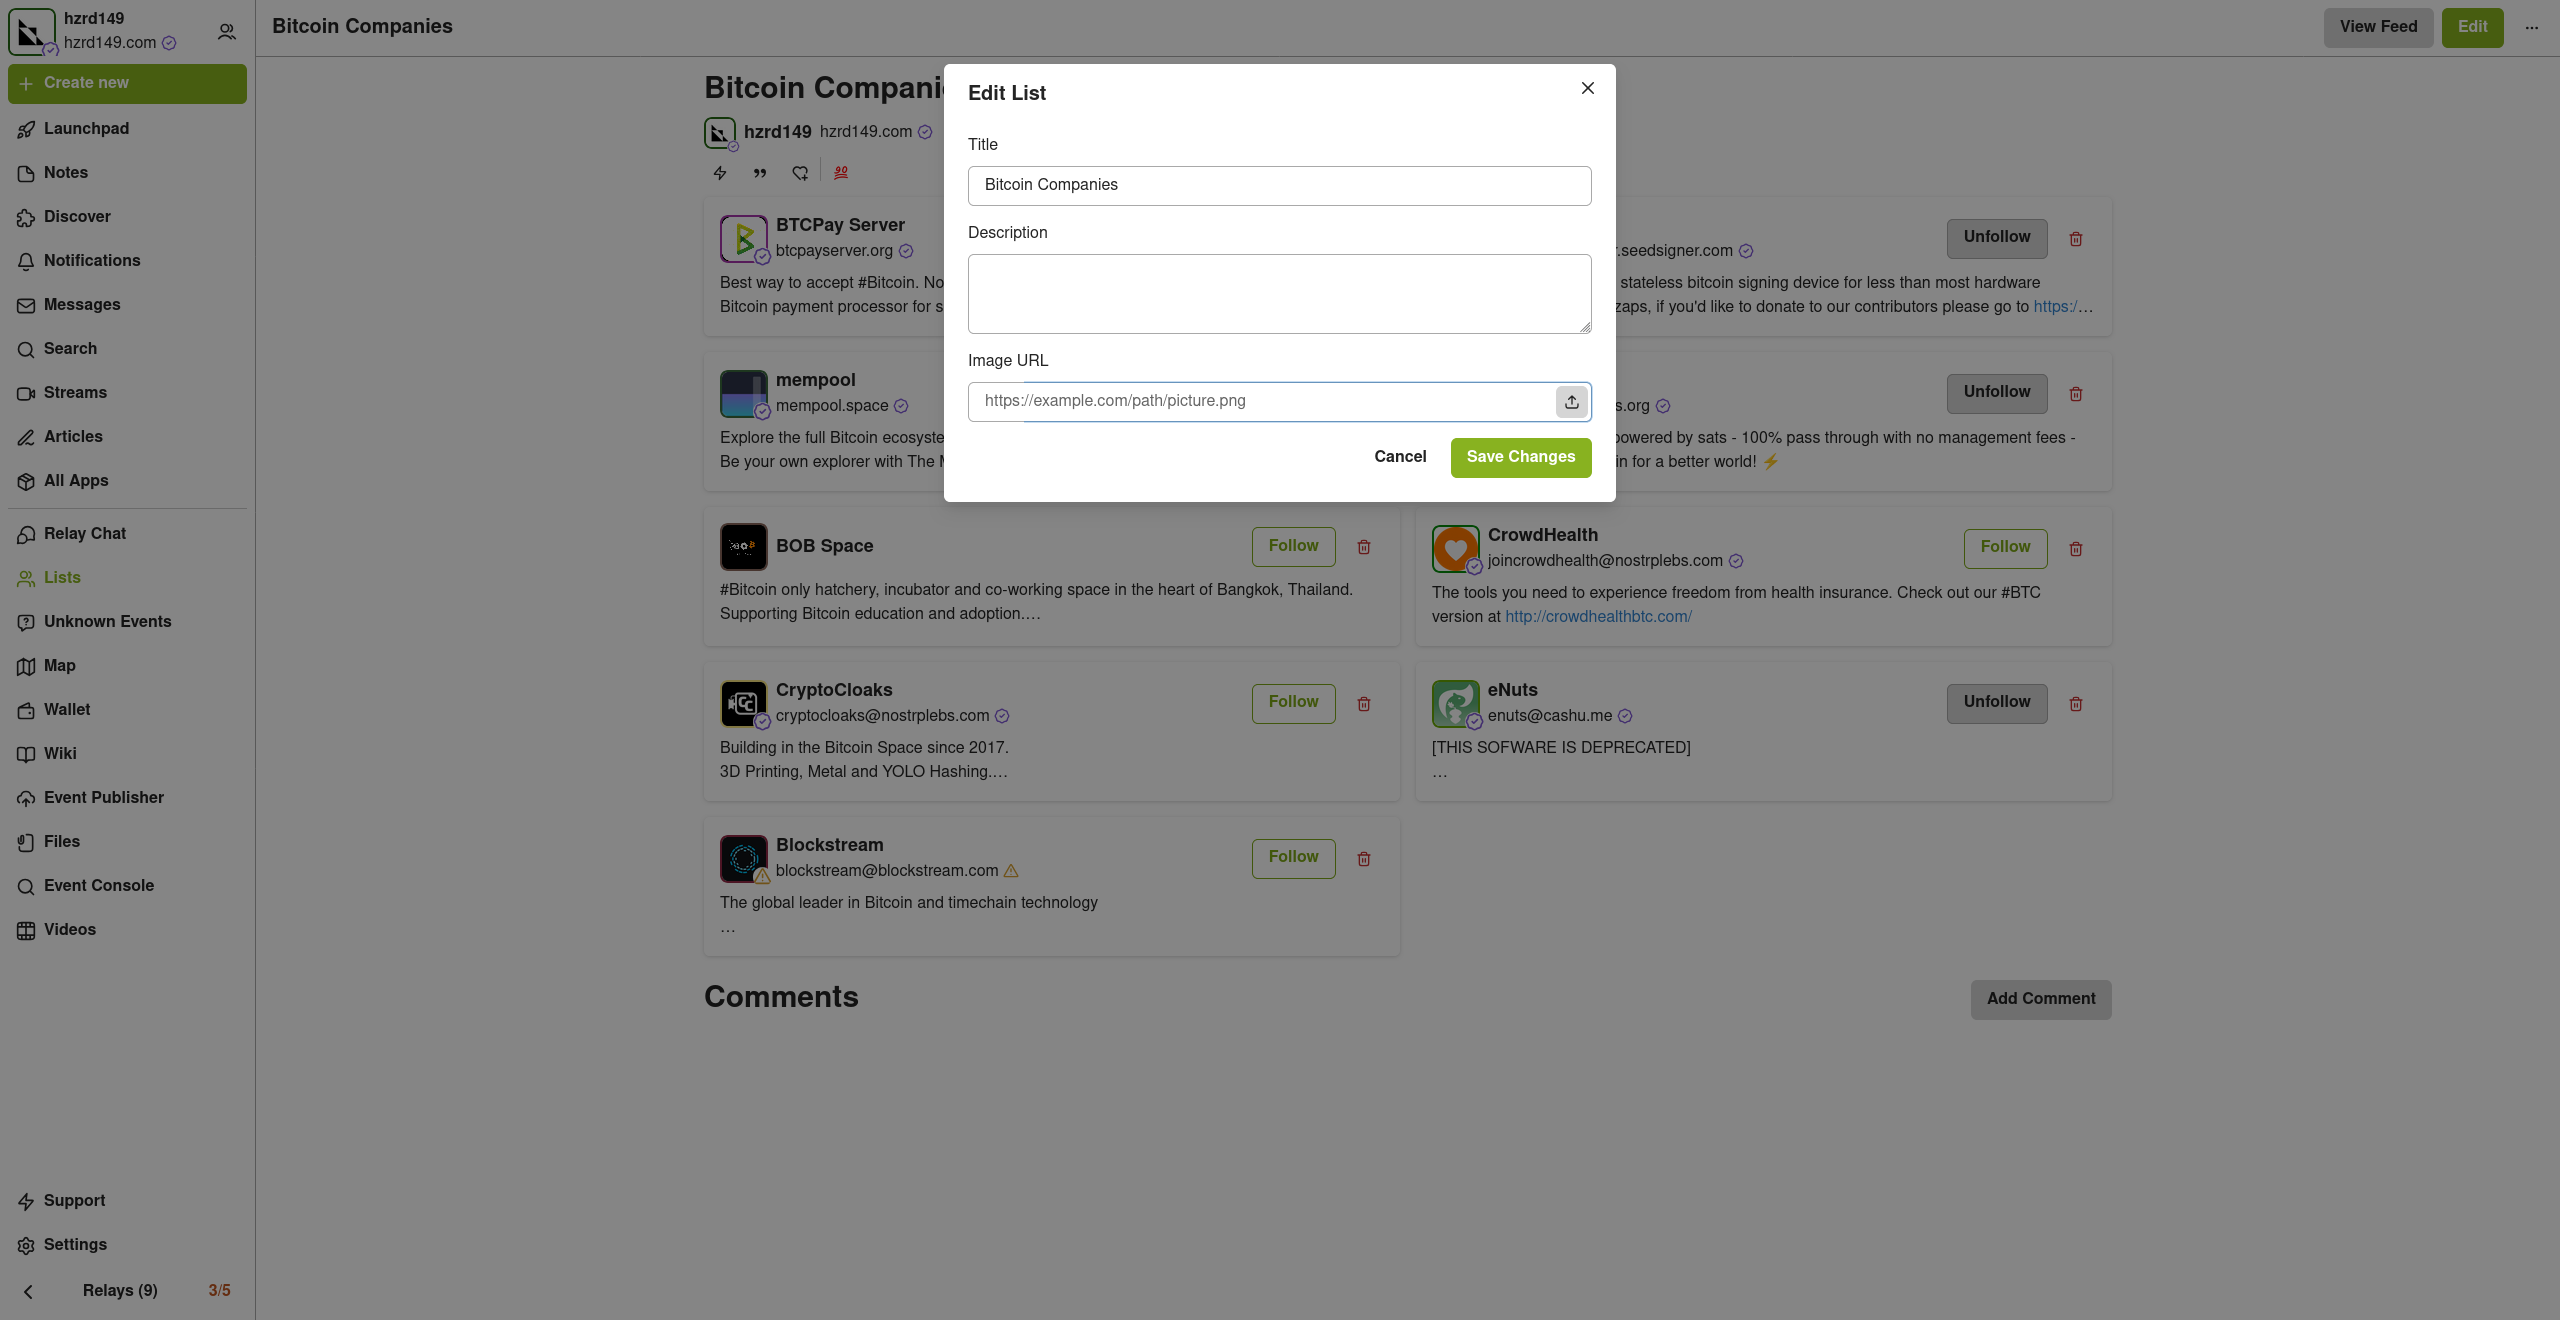
Cleaned up lists
The list views are a little cleaner now, and they have a simple edit modal
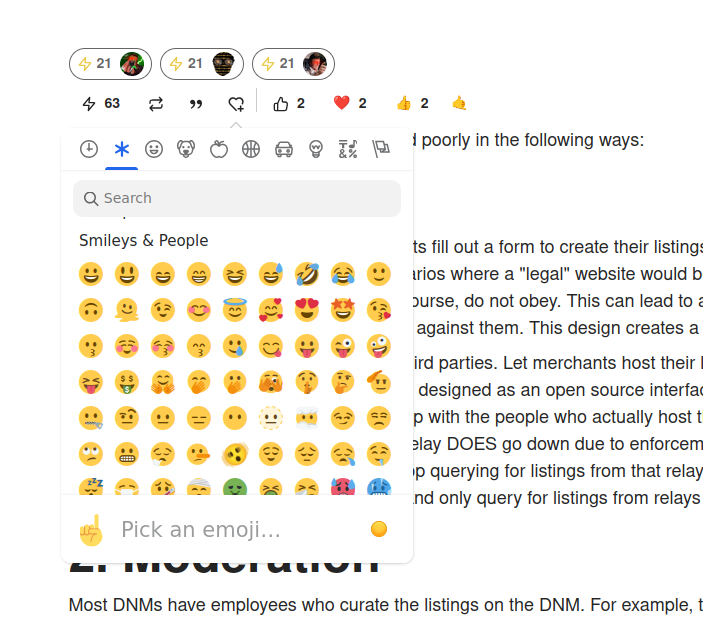
New emoji picker
Just another small improvement that makes the app feel more complete.
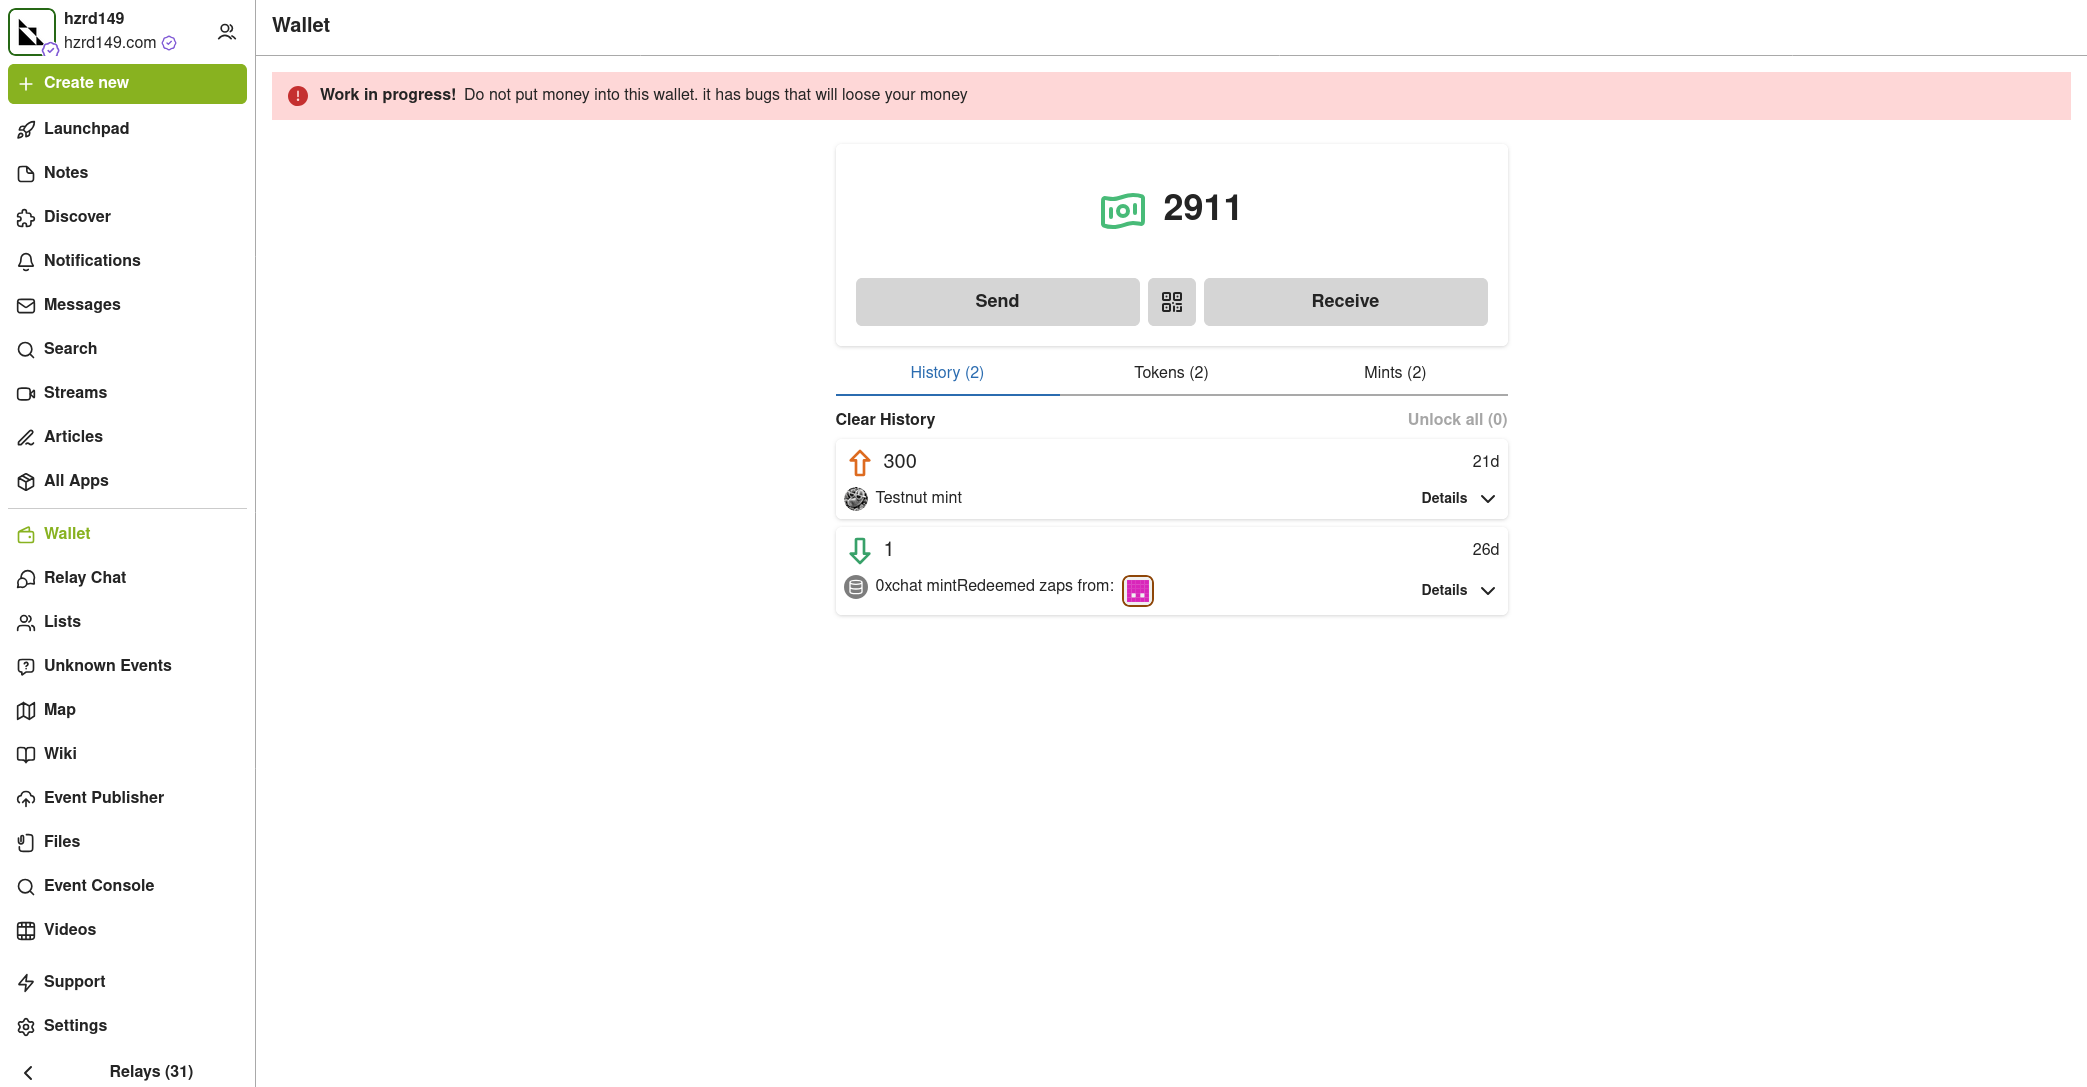
Experimental Wallet
There is a new "wallet" view in the app that lets you manage your NIP-60 cashu wallet. its very experimental and probably won't work for you, but its there and I hope to finish it up so the app can support NIP-61 nutzaps.
WARNING: Don't feed the wallet your hard earned sats, it will eat them!
Smaller improvements
- Added NSFW flag for replies
- Updated NIP-48 bunker login to work with new spec
- Linkfy BIPs
- Added 404 page
- Add NIP-22 comments under badges, files, and articles
- Add max height to timeline notes
- Fix articles view freezing on load
- Add option to mirror blobs when sharing notes
- Remove "open in drawer" for notes
-
@ 4ba8e86d:89d32de4
2025-05-02 13:51:37
Tutorial OpenKeychain
- Baixar no F-droid https://f-droid.org/app/org.sufficientlysecure.keychain
Ao abrir o OpenKeychain pela primeira vez, você verá uma tela inicial indicando que ainda não há chaves configuradas. Nesse ponto, você terá três opções:
-
Criar uma nova chave PGP diretamente no OpenKeychain: Ideal para quem está começando e precisa de uma solução simples para criptografia em comunicações diárias.
-
Usar um token de segurança (como Fidesmo, Yubikey, NEO, ou Sigilance) Se você busca uma segurança ainda maior, pode optar por armazenar sua chave privada em um token de segurança. Com essa configuração, a chave privada nunca é salva no dispositivo móvel. O celular atua apenas como uma interface de comunicação, enquanto a chave permanece protegida no token, fora do alcance de possíveis invasores remotos. Isso garante que somente quem possui o token fisicamente possa usar a chave, elevando significativamente o nível de segurança e controle sobre seus dados.
-
Importar uma chave PGP existente: Você pode importar uma chave PGP que já tenha sido gerada anteriormente, seja por meio de um arquivo no dispositivo ou por outro meio ler na área de transferência. https://image.nostr.build/51fdd924df4843ab73faa02a505c8fb17794f1789396ed89b154348ebb337f07.jpg
1. CRIANDO UMA NOVA CHAVE PGP.
Para iniciantes, recomendamos criar uma nova chave diretamente no aplicativo. abordaremos o uso do OpenKeychain em modo online, que é mais comum para comunicações diárias.
Passo 1: Clique em “Criar minha chave”. https://image.nostr.build/235f5cfdf4c3006ca3b00342741003f79a5055355c2a8ee425fc33c875f51e49.jpg
Passo 2: Criando sua chave PGP.
Para criar sua chave, você precisará fornecer algumas informações Os campos 'Nome' e 'Endereço de e-mail' são apenas formas convenientes para identificar a sua chave PGP.
-
Nome: Escolha um nome ou um pseudônimo. https://image.nostr.build/de3fe3ddbde0c7bf084be6e4b8150fdb8612365550622559b0ee72f50f56a159.jpg
-
E-mail: Associe um endereço de e-mail à chave, seja ele pessoal ou um e-mail relacionado ao pseudônimo. https://image.nostr.build/aff62baaeafe2c9a429ef10435a6f99dea36d6cfd7494e2bb882421dc8ed0f4e.jpg
2. REVISANDO E PERSONALIZANDO A CRIAÇÃO DA CHAVE.
Passo 3: Antes de criar sua chave PGP, verifique se os dados inseridos estão corretos. https://image.nostr.build/a8ec09ef3d9b4f557b0c4e380e7ca45d0fdbfa33fe80becea03ed0e5f5eedd24.jpg
Você também pode personalizar as configurações de segurança clicando nos três pontos no canto superior direito. https://image.nostr.build/1ce615555cea9a979ea951472052a219e77f4e1ebaaf5fcbbe9e91ea4f852bce.jpg
Ao cliclar em ' nova subchave ' pode alterar a data de expiração e pode mudar a criptografia usado na chave cliclando opção ed2255/cv255. https://image.nostr.build/b3224ff3dbe48ff78c4a2df8b001926b6d3eef1e33ef677a73b0d281791073da.jpg https://image.nostr.build/7763c7847e062cdcf71aafedbc2ef4c38056fd66aeb162ef3a1c30c028a14376.jpg https://image.nostr.build/5d3e20ade460dd5e89cc001ebdc062a36aff2c0e1573584ca3c0d1cb34bddcce.jpg
Neste tutorial, utilizaremos as configurações padrão do aplicativo.
Passo 4: Clique em "Criar chave" para concluir o processo. https://image.nostr.build/a8ec09ef3d9b4f557b0c4e380e7ca45d0fdbfa33fe80becea03ed0e5f5eedd24.jpg
3. Como Compartilhar sua Chave PGP Pública
Após criar sua chave PGP, você pode compartilhá-la para que outras pessoas possam enviar mensagens criptografadas para você. Veja o passo a passo de como exibir e compartilhar sua chave pública:
Passo 1: Acesse sua chave pública
Abra o OpenKeychain e selecione a chave que deseja compartilhar. Clique na chave para visualizar os detalhes. https://image.nostr.build/689c5237075317e89e183d2664630de973b09b68aaf8f3e3033654e987b781be.jpg https://image.nostr.build/4001610109579f27535628932258087b3b06c1f86b05f4f85537b6585c12a10b.jpg
Passo 2: Copiar sua chave pública
Nos detalhes da chave, você verá a opção "Copiar para a Área de Transferência". Clique nessa opção para copiar o código da sua chave pública. https://image.nostr.build/01ab3efa5e997e1910a2f8f7a888e6ad60350574cca4ca0214eee5581797f704.jpg
A chave PGP copiada terá o seguinte formato:
-----BEGIN PGP PUBLIC KEY BLOCK-----
mDMEZwsLHRYJKwYBBAHaRw8BAQdA6NRLlJIWnTBJtYwZHlrMbTKRbYuXmjsMn8MB 7etV3HK0JERhbmllbCBGcmFnYSAgPGRhbmllbGZyYWdhQG1haWwuaTJwPohyBBMW CAAaBAsJCAcCFQgCFgECGQEFgmcLCx0CngECmwMACgkQFZf+kMeJWpR4cwEA8Jt1 TZ/+YlHg3EYphW8KsZOboHLi+L88whrWbka+0s8A/iuaNFAK/oQAlM2YI2e0rAjA VuUCo66mERQNLl2/qN0LuDgEZwsLHRIKKwYBBAGXVQEFAQEHQEj/ZfJolkCjldXP 0KQimE/3PfO9BdJeRtzZA+SsJDh+AwEIB4hhBBgWCAAJBYJnCwsdApsMAAoJEBWX /pDHiVqUo/oA/266xy7kIZvd0PF1QU9mv1m2oOdo7QSoqvgFiq6AmelbAP9lExY5 edctTa/zl87lCddYsZZhxG9g2Cg7xX/XsfrnAA== =TniY -----END PGP PUBLIC KEY BLOCK-----
Dica: Se ocorrer algum erro ao compartilhar sua chave pública com um amigo, peça para que ele a criptografe para ele mesmo. Isso permitirá que ele adicione a chave corretamente. Caso a chave pública ainda não esteja no dispositivo, ao clicar em "Backup de chave", aparecerá a opção para importá-la. Se a chave já estiver no dispositivo, essa ação irá recarregá-la. https://image.nostr.build/cd12abf07c93473db95483fe23112325f89d3eb02977e42756708bbd043f8bcf.jpg https://image.nostr.build/537aeae38d229ee2cc78e18f412237b659c059e1c74fd7f0deecfe37f15713c9.jpg https://image.nostr.build/16c8a3db5966c7c06904ee236655f47a6464ae0c1b5af6af27b28c61611d2bbe.jpg
Passo 3: Compartilhar sua chave PGP
Você pode colar a chave pública em e-mails, assinaturas, perfis de redes sociais ou outros meios para compartilhá-la facilmente. Para facilitar a visualização, você também pode exibi-la em seu perfil de redes sociais.
Para acessar mais opções de compartilhamento, clique nos três pontos no canto superior direito e selecione a opção "Avançado". https://image.nostr.build/0d4a13b7bd9a4794017247d1a56fac082db0f993a2011a4dd40e388b22ec88f5.jpg https://image.nostr.build/4ac2a7bc9fa726531a945221cf7d10e0e387deba68100ccf52fdedfcd17cbd59.jpg
Na seção "Compartilhar", você verá sua Key ID e terá a opção de publicar sua chave PGP em um servidor de chaves. https://image.nostr.build/1e972cc211a6d8060cdbd4a8aa642dd1a292810c532f178d3ddb133d1b9bca76.jpg
Passo 4: Como compartilhar sua chave pública PGP no formato .asc. no OpenKeychain
1 . Acesse sua chave
Abra o OpenKeychain e toque na chave que você deseja compartilhar. Isso abrirá a tela com os detalhes da chave. https://image.nostr.build/c080f03d2eb7a9f7833fec0ff1942a5b70b97e4f7da7c6bc79ca300ef9ace55d.jpg
2 . Compartilhe o arquivo .asc
Toque no ícone de compartilhamento, como indicado na imagem abaixo. O aplicativo abrirá a janela para que você escolha por qual app deseja compartilhar sua chave pública no formato .asc. Nesse exemplo, usei o SimpleXChat , mas você pode usar qualquer aplicativo de sua preferência.
-
Botão de compartilhar. https://image.nostr.build/8da74bdb04737a45df671a30bba1dd2e7980841fa0c2d751d6649630e7c25470.jpg
-
Seleção do aplicativo para compartilhamento. https://image.nostr.build/5444f4e9d3fa5aef6b191bb6f553f94c6e49d30ead874c9ee435bca3218fd6c8.jpg
-
Enviando via SimpleXChat. https://image.nostr.build/e5d1ca04cbc69e1e8ac5caf1ab2a4b9b695500861c1ae9c55cea679cce349214.jpg
Sugestão para compartilhar nas redes sociais:
Você pode exibir sua chave de forma simples, por exemplo:
PGP: 1597 FE90 C789 5A94
Importar a chave pública usando a fingerprint
Passo 1:Clique no ícone "+" para começar. https://image.nostr.build/ca6e6e569b4be60165eaf60c7ba1e6e3ec781b525e467c72b4f3605837e6b5ec.jpg
Passo 2: Selecione a opção "Buscar Chave". https://image.nostr.build/87e27d9435e6e3ef78063b9f15799a8120ead4637cd06c89c0220b48327573ae.jpg
Passo 3: Digite a fingerprint da chave em letras minúsculas, sem espaços. A chave correspondente aparecerá para ser adicionada. https://image.nostr.build/33e6819edd4582d7a8513e8814dacb07e1a62994bb3238c1b5b3865a46b5f234.jpg
Além disso, você pode compartilhar sua chave pública em formato QR Code, facilitando a troca de chaves em eventos ou conversas rápidas. Como Assinar Mensagens para Confirmar a Autenticidade da Sua Rede Social
Você pode autenticar sua conta em redes sociais utilizando sua chave PGP. Ao assinar uma mensagem com sua chave, você demonstra que realmente possui essa conta. Siga o passo a passo abaixo para assinar uma mensagem:
Passo 1: Clique na sua chave PGP. https://image.nostr.build/ffacce1bfb293c9a0888cd5efe340a63d96b293f4c010f8626105c7b212d8558.jpg
Passo 2: Clique no ícone indicado pela seta para abrir o campo de texto. https://image.nostr.build/4e992a2553810e2583b9d190280ce00a52fc423600a75eca48cbf541cf47d3c2.jpg
Passo 3: Deixe a opção "Encriptar para:" vazio. Em "Assinar com:", selecione sua chave PGP e digite a mensagem que deseja enviar, como o nome da sua rede social. https://image.nostr.build/a4a2a8d233d186e3d8d9adddccc445bcb3ca3ed88de0db671a77cede12323a75.jpg
Passo 4: Clique no ícone indicado pela seta para copiar o texto assinado. Uma mensagem aparecerá informando: "Assinado/Encriptado com Sucesso". https://image.nostr.build/a076dfc90e30a495af0872005bf70f412df57b7a0e1c2e17cf5aee9e9b3e39aa.jpg
A mensagem copiada terá o seguinte formato:
-----BEGIN PGP SIGNED MESSAGE----- Hash: SHA256
Minha rede social NOSTR é Danielfraga oficial. -----BEGIN PGP SIGNATURE-----
iIQEARYIACwlHERhbmllbCBGcmFnYSAgPGRhbmllbGZyYWdhQG1haWwuaTJwPgUC ZxBBLgAKCRAVl/6Qx4lalGeNAPwP71rpsbhRnZhoWZsTDOFZY8ep/d0e5qYx5iPx HV26dwD/fKyiir1TR8JwZvEbOTYS0+Dn4DFlRAAfR3lKVTC96w4= =37Lj -----END PGP SIGNATURE-----
Com isso, você pode facilmente demonstrar a autenticidade da sua conta nas redes sociais.
4. PROTEGENDO SUA CHAVE COM UMA SENHA.
Passo 5: Após a criação da chave, é fundamental definir uma senha (ou passphrase) para adicionar uma camada extra de segurança. Recomendamos usar senhas longas (com mais de 20 caracteres) e de alta entropia para evitar ataques de força bruta. Ferramentas como KeePassDX ou Bitwarden podem ajudá-lo a gerar e gerenciar essas senhas.
Para definir a senha, clique na sua chave PGP, acesse o menu no canto superior direito e selecione "Alterar senha". https://image.nostr.build/689c5237075317e89e183d2664630de973b09b68aaf8f3e3033654e987b781be.jpg https://image.nostr.build/f28ecaa9890a8827f93cac78846c4b2ef67f86ccfc3501fdadf1d1c4874b0041.jpg https://image.nostr.build/919c277fbec63c397402abdd60f915cb239a674c317855cbda63a38edef80789.jpg
Agora basta adicionar uma senha forte. https://image.nostr.build/eb378219fbb1780f89663a474ce43b8d8ebb13beeb538f2a16279b056e5d9645.jpg https://image.nostr.build/cdfa3f9c6c4045841341da789deabb6318107812d5ba195529418572ab352aaf.jpg
5. CRIPTOGRAFAR E DESCRIPTOGRAFAR MENSAGENS E ARQUIVOS COM SUA CHAVE PGP
Criptografar Mensagens
Você pode criptografar mensagens para garantir que apenas o destinatário, que possui sua chave pública, possa lê-las. Siga os passos abaixo para criptografar um texto:
Passo 1: Abra o menu lateral clicando no ícone no canto superior esquerdo.
https://image.nostr.build/13ac93b38dd1633118ae3142401c13e8a089caabdf4617055284cc521a45b069.jpgPasso 2: Selecione a opção "Encriptar/Descriptar".
https://image.nostr.build/8cd905d616b53968f0551c071d9acc2f47bbe8434c2c7e1a33076a504342de48.jpgPasso 3: Clique na opção "Encriptar Texto".
https://image.nostr.build/405a730a6c774759d7913f92f59059d43146db4afb28451a6f8833f94e99437f.jpgPasso 4: Preencha os seguintes campos: https://image.nostr.build/7dc5eba39ff82a321195dbf46b8113818632e3ef41175991d58e799a8e9d2751.jpg
-
Encriptar para: Selecione o destinatário da mensagem, ou seja, a pessoa para quem você está enviando o texto criptografado.
https://image.nostr.build/1e8c8cba6d3c3136d9857512e2794a81ceb7434eccdfb0f7d26cdef008b2e6d2.jpg -
Assinar com: Escolha sua chave PGP para assinar a mensagem.
https://image.nostr.build/d25b228c35b132d396d01c354ef093b43b3565578fbc0d6ff7b9de4e41619855.jpg -
Digitar o texto: No campo de texto, escreva a mensagem que deseja criptografar.
https://image.nostr.build/8537271dfa4445e60cb4c3cdb5d97571dc0ff5ee8acd6ed89a8c81e4bd8736c2.jpg
Passo 5: Depois de preencher os campos, você pode copiar o texto criptografado de duas formas:
-
Copiar para a área de transferência: Clique na opção para copiar o texto criptografado e cole-o em um aplicativo de mensagens para enviá-lo.
https://image.nostr.build/a5cb8e2c538a38db3972e7f3ac9aa9f602cda6b62848ff0c4b99928a67dcd486.jpg -
Compartilhar diretamente: Utilize a opção de compartilhamento para enviar o texto criptografado diretamente através de seus aplicativos de mensagens.
https://image.nostr.build/2b79cb564d623788a0de1111a067e0eb496f743389d465d4f4e8f6e65f0d08a7.jpg https://image.nostr.build/ff59e52bc8ab54ff377980a6ba5d1c4743d3298de11e5daa187ab7d45163a7be.jpg
Criptografar arquivos.
Passo 1: Abra o menu lateral clicando no ícone no canto superior esquerdo.
https://image.nostr.build/13ac93b38dd1633118ae3142401c13e8a089caabdf4617055284cc521a45b069.jpgPasso 2: Selecione a opção "Encriptar/Descriptar".
https://image.nostr.build/8cd905d616b53968f0551c071d9acc2f47bbe8434c2c7e1a33076a504342de48.jpgPasso 3 : clique na opção "Encriptar arquivos ". https://image.nostr.build/3fcae48ee38e7f4079ebccfd3eafb9ab0ad3559221d2c3560cdfe60e29f56a15.jpg
Passo 4 : os passos a seguir são os mesmo que você seguiu pra encriptar a mensagem texto. Ítens "Encriptar para:" "Assinar com:" https://image.nostr.build/4d6599b9d3a9fdfae0964daaa9dae513d5ce277a7b61930fa2937d534f72ed40.jpg
Passo 5 : clilcar na opção " Adicionair arquivo(s)" Vai abrir na memória interna do celular selecione o arquivo que deseja encriptar. https://image.nostr.build/09e3b9b54a1406426114926aab19011c36b98886ebae6fcf556cfea83bb2c2f4.jpg https://image.nostr.build/af422e243b36762dd66111ec7c848a1352c100ca3040dc21792c923f80aef74d.jpg https://image.nostr.build/ebebbdb273b4bca58d901852aec1c60e4799aa77e9d12a31f992b0cf8f73e753.jpg
Passo 6: Depois de preencher os campos, você pode compartilhar o arquivo criptografado de duas formas:
-
Salvar na memória do celular: A primeira opção salva o arquivo criptografado no armazenamento do seu dispositivo. Você terá a opção de editar o nome do arquivo antes de salvar.
https://image.nostr.build/0a47c1e9f0003541f47091b2c2e8ce6b8d1533d95463e331b218070bae964ac8.jpg https://image.nostr.build/95a7a2b67356eb5ded5b217bab38a19bdeba5af7befd105834e413e0aec45462.jpg https://image.nostr.build/66cb3d22b271f3b73b7015613c72711a3ffbf5e1070d43153f9d1f3fcf35001c.jpg https://image.nostr.build/f9624d86f7592fe7ffad932b7805762dc279d9e8ff410222108155438a2c970f.jpg -
Compartilhar diretamente: Utilize a opção de compartilhamento para enviar o arquivo criptografado diretamente por meio dos seus aplicativos de mensagens.
https://image.nostr.build/85541e466c7755c65bd6ba0208a6d8612beaa5298712b6d92f53865167695a38.jpg https://image.nostr.build/bf1e0f0aeb60cafbdf82af4b3b598288519e85b396bd3f9e00e61f65b89ea9f8.jpg https://image.nostr.build/fb090339898f37cdbb020828689b142ca601ca3ee549f67ddf6b2e094df9ab9f.jpg https://image.nostr.build/50c249ced06efe465ba533fef15207b0dcd1a725e9b2c139e8d85c13fd798276.jpg
Descriptografar Mensagens e Arquivos
Para ler uma mensagem ou arquivo criptografado que você recebeu, utilize sua chave privada. Siga os passos abaixo:
Descriptografar Mensagens
Passo 1: Copie a mensagem criptografada que você recebeu.
https://image.nostr.build/c37754b12a458e0176b9137ae0aa9e8209f853bf9d9292c0867fd8b0606d53c4.jpgPasso 2: Clique na opção "Ler da área de transferência" para descriptografar o texto.
https://image.nostr.build/d83c7dad2ee1cb6267779863bc174ee1a8f3cc3c86b69063345321027bdde7b5.jpg https://image.nostr.build/c0fae86e6ab1fe9dcee86753972c818bed489ea11efdd09b7e7da7422a9c81eb.jpgDescriptografar Arquivos
Passo 1: Clique na opção "Selecionar arquivo de entrada".
https://image.nostr.build/9c276c630311d19a576f2e35b5ba82bac07360476edae3f1a8697ff85df9e3c9.jpgPasso 2: Selecione o arquivo criptografado que deseja descriptografar.
https://image.nostr.build/6b6c2a3284ba96e7168fc7bd0916020c4f1bed7b77dfca48227fc96d6929e15a.jpg https://image.nostr.build/9945aad644af2e2020e07e55f65f11a0958d55e8fc9e13c862e6b9ca88b4f4d9.jpg6. BACKUP E RESTAURAÇÃO DE CHAVE PGP.
Realizar o backup das suas chaves PGP é fundamental para evitar a perda de acesso às suas mensagens e dados criptografados. O OpenKeychain facilita esse processo, permitindo que você faça um backup completo e seguro. Recomendamos que você armazene o backup em um local seguro, como um HD externo ou pendrive conectado via cabo OTG, sempre protegendo-o com senha.
PASSOS PARA REALIZAR O BACKUP:
Passo 1: Abra o menu lateral clicando no ícone no canto superior esquerdo.
https://image.nostr.build/13ac93b38dd1633118ae3142401c13e8a089caabdf4617055284cc521a45b069.jpgPasso 2: Selecione a opção Backup/restaurar.
https://image.nostr.build/6fa8fd14e23b47c6c924bc0d900646663f2124a93d8172ae79fdf43b5c7d4490.jpgPasso 3: Escolha a primeira opção: Backup completo (criptografado).
https://image.nostr.build/4875fb27b6d04c3cb838b4fb9f308ef9194edc35ba1254ba965b7f0db2544170.jpgPasso 4: O backup será protegido por um código de backup gerado automaticamente. Anote esse código em um papel e guarde local seguro, pois sem ele você não conseguirá recuperar suas chaves PGP. Após anotar o código, marque a opção “Anotei o código” e clique em Salvar Backup. Obs: todas as vezes que você for fazer o backup da sua chave PGP vai ser criado um novo código aleatório.
https://image.nostr.build/72a317ef5e59a01c03c36f1d04a91d42c418a478cc82e372acf21bb8302daa00.jpg
Passo 5: Escolha o local onde deseja salvar o backup (HD externo, pendrive, etc.), confirme sua escolha e clique em OK. Você verá uma mensagem de confirmação indicando que o backup foi salvo com sucesso.
https://image.nostr.build/d757e8bdf429371320daa44be8a48a0dbeb2324129f4254327f0f0383e70ede4.jpg https://image.nostr.build/f3ad80ceb8a191b4d1b40722b1d0d4f85bf183d412e7d7d901b25d19b2dfe0e3.jpg
Importação da Chave PGP
Caso você precise restaurar suas chaves PGP a partir de um backup, o OpenKeychain também facilita o processo de importação. Siga os passos abaixo para restaurar sua chave PGP:
Passo 1: Selecione a opção "Selecionar arquivo de entrada"
Abra o OpenKeychain, acesse o menu lateral no canto superior esquerdo e escolha a opção "Selecionar arquivo de entrada" para localizar o arquivo de backup que você deseja importar.
https://image.nostr.build/a06ddc1c1e6c50519097e614aa25b14311e49c0ca4d4607e42ebdcca3a6641c4.jpgPasso 2: Selecione o arquivo de backup
Navegue até o local onde você salvou o arquivo de backup (HD externo, pendrive, etc.) e selecione-o. Em seguida, o OpenKeychain solicitará que você insira o código de recuperação que foi gerado no momento do backup. https://image.nostr.build/9d5649c04a98ec8b0a29355d9068e48313b1c5dc36cd965961f4d33f22d10046.jpgPasso 3: Digite o código de recuperação
Insira o código de recuperação que você anotou anteriormente. É importante digitar o código corretamente para garantir o sucesso da restauração.Passo 4: Depois de inserir o código corretamente, o OpenKeychain irá restaurar suas chaves PGP, e uma mensagem de confirmação será exibida, indicando que a recuperação foi concluída com sucesso.
Agora suas chaves estão restauradas e você pode continuar usando o OpenKeychain para gerenciar suas comunicações criptografadas de maneira segura.
https://www.openkeychain.org/
https://github.com/open-keychain/open-keychain
https://youtu.be/fptlAx_j4OA
-
@ 3ffac3a6:2d656657
2025-05-02 03:50:51
Introduction: Don't Despair—This Can Be Fixed (But Don't Reboot Yet)
Running ZFS on a Raspberry Pi offers powerful features for home servers and personal NAS setups. But with power comes complexity, and in recent months, a quiet pitfall has emerged for Pi users who track kernel updates closely: upgrading to an unsupported kernel version breaks ZFS.
⚠️ Important Warning: If you've just upgraded your kernel and you're using ZFS, do not reboot yet. Rebooting without a working ZFS module can leave your system unbootable—even if you don't have critical partitions on ZFS. The system may hang because it tries to load the missing ZFS kernel module during boot and fails, halting the boot process.
If you're already facing a broken setup or can't boot — don't panic. This guide outlines both the worst-case scenario and the ideal recovery strategy. Whether you're locked out or preparing for a smooth upgrade, we've got you covered.
The Problem: A Kernel Update Too Far
As of ZFS version 2.2.3 (used in Debian-based Raspberry Pi OS), the filesystem supports Linux kernels up to 6.7. However, Raspberry Pi OS backports recently began shipping 6.12.x kernels. If you upgrade to 6.12 without precautions:
- ZFS will fail to compile against the new kernel
- DKMS errors will appear during package updates
- Your ZFS module will be missing after reboot
- Your Raspberry Pi may fail to boot, even without ZFS-mounted root or critical paths, simply due to systemd or boot scripts expecting the kernel module to be present
Example ZFS Compilation Error:
During package updates or installs, you'll see something like:
checking whether bdev_open_by_path() exists... configure: error:
        *** None of the expected "blkdev_get_by_path()" interfaces were detected.
        *** This may be because your kernel version is newer than what is
        *** supported, or you are using a patched custom kernel with
        *** incompatible modifications.
        ***
        *** ZFS Version: zfs-2.2.3-1~bpo12+1~rpt1
        *** Compatible Kernels: 3.10 - 6.7
This error means ZFS cannot build its kernel module against Linux 6.12.x, making it unusable.
Why This Happens: The Version Trap
The key problem is that ZFS 2.2.3 remains installed even after a kernel upgrade, and it doesn't get upgraded automatically during
apt upgrade. Since ZFS 2.2.3 only supports up to kernel 6.7, it fails to compile against 6.12.x.However, if you remove and then reinstall ZFS, the package manager installs ZFS 2.3.1, which does support Linux kernel 6.12.x. This version transition is what resolves the issue — but only if you explicitly purge and reinstall ZFS.
Worst Case: The System That Wouldn’t Boot
After upgrading the kernel and rebooting, the system failed to boot properly. It showed errors like:
cannot open access to console, the root account is locked
Although the system did not have critical filesystems on ZFS, the boot process still stalled because system services attempted to load the ZFS kernel module, which was no longer available. This resulted in an unrecoverable boot failure.
The only way forward was to reformat and reinstall Raspberry Pi OS. However, the default Raspberry Pi OS image still comes with a 6.6.x kernel, which is incompatible with ZFS 2.3.1 and newer kernels unless upgraded. Therefore, the recovery process requires one crucial step:
- First, perform a full system upgrade:
sudo apt update && sudo apt full-upgradeThis brings the kernel up to 6.12.x.
- Then, reinstall ZFS:
sudo apt install zfs-dkms zfsutils-linuxOnce this is complete, your system will be running kernel 6.12 with ZFS 2.3.1, and you can safely import your pools and resume operations.
Best Case Recovery: Clean Cut, Clean Upgrade
For users who can still log into their system, here's the cleanest and safest sequence to move forward:
- Stop all services using ZFS, including Docker, NFS, Samba, backup tools, etc.
- Export all ZFS pools:
sudo zpool export -a3. Disable swap if it lives on a ZFS vdev:sudo swapoff /dev/sdXn4. Purge ZFS packages:sudo apt purge zfsutils-linux zfs-dkms zfs-zed sudo rm -rf /usr/src/zfs* /var/lib/dkms/zfs5. Update the kernel to the desired version:sudo apt update && sudo apt full-upgrade6. Reboot into the new kernel:sudo reboot7. Reinstall ZFS:sudo apt install zfs-dkms zfsutils-linux8. Import your pool(s):sudo zpool import poolname9. Restart services that depend on ZFS.
Final Notes: Prevention Is Better Than Recovery
To avoid this issue in the future:
- Hold your current working kernel version:
sudo apt-mark hold linux-image-rpi-v8 linux-headers-rpi-v8* Or track ZFS GitHub for kernel compatibility before upgrading * Or test upgrades on a second Pi or cloned SD card before rolling them out to production
Conclusion: A Solvable Trap
ZFS on the Raspberry Pi remains a powerful option, but it demands careful version tracking. If you upgrade responsibly, or recover cleanly as described above, you can continue benefiting from advanced features like snapshots, send/receive, and compression even on this tiny powerhouse.
Don’t let a kernel update ruin your storage plans—with preparation, the Pi + ZFS combo can remain stable and strong.
-
@ 21335073:a244b1ad
2025-05-01 01:51:10
Please respect Virginia Giuffre’s memory by refraining from asking about the circumstances or theories surrounding her passing.
Since Virginia Giuffre’s death, I’ve reflected on what she would want me to say or do. This piece is my attempt to honor her legacy.
When I first spoke with Virginia, I was struck by her unshakable hope. I had grown cynical after years in the anti-human trafficking movement, worn down by a broken system and a government that often seemed complicit. But Virginia’s passion, creativity, and belief that survivors could be heard reignited something in me. She reminded me of my younger, more hopeful self. Instead of warning her about the challenges ahead, I let her dream big, unburdened by my own disillusionment. That conversation changed me for the better, and following her lead led to meaningful progress.
Virginia was one of the bravest people I’ve ever known. As a survivor of Epstein, Maxwell, and their co-conspirators, she risked everything to speak out, taking on some of the world’s most powerful figures.
She loved when I said, “Epstein isn’t the only Epstein.” This wasn’t just about one man—it was a call to hold all abusers accountable and to ensure survivors find hope and healing.
The Epstein case often gets reduced to sensational details about the elite, but that misses the bigger picture. Yes, we should be holding all of the co-conspirators accountable, we must listen to the survivors’ stories. Their experiences reveal how predators exploit vulnerabilities, offering lessons to prevent future victims.
You’re not powerless in this fight. Educate yourself about trafficking and abuse—online and offline—and take steps to protect those around you. Supporting survivors starts with small, meaningful actions. Free online resources can guide you in being a safe, supportive presence.
When high-profile accusations arise, resist snap judgments. Instead of dismissing survivors as “crazy,” pause to consider the trauma they may be navigating. Speaking out or coping with abuse is never easy. You don’t have to believe every claim, but you can refrain from attacking accusers online.
Society also fails at providing aftercare for survivors. The government, often part of the problem, won’t solve this. It’s up to us. Prevention is critical, but when abuse occurs, step up for your loved ones and community. Protect the vulnerable. it’s a challenging but a rewarding journey.
If you’re contributing to Nostr, you’re helping build a censorship resistant platform where survivors can share their stories freely, no matter how powerful their abusers are. Their voices can endure here, offering strength and hope to others. This gives me great hope for the future.
Virginia Giuffre’s courage was a gift to the world. It was an honor to know and serve her. She will be deeply missed. My hope is that her story inspires others to take on the powerful.
-
@ 266815e0:6cd408a5
2025-04-29 17:47:57
I'm excited to announce the release of Applesauce v1.0.0! There are a few breaking changes and a lot of improvements and new features across all packages. Each package has been updated to 1.0.0, marking a stable API for developers to build upon.
Applesauce core changes
There was a change in the
applesauce-corepackage in theQueryStore.The
Queryinterface has been converted to a method instead of an object withkeyandrunfields.A bunch of new helper methods and queries were added, checkout the changelog for a full list.
Applesauce Relay
There is a new
applesauce-relaypackage that provides a simple RxJS based api for connecting to relays and publishing events.Documentation: applesauce-relay
Features:
- A simple API for subscribing or publishing to a single relay or a group of relays
- No
connectorclosemethods, connections are managed automatically by rxjs - NIP-11
auth_requiredsupport - Support for NIP-42 authentication
- Prebuilt or custom re-connection back-off
- Keep-alive timeout (default 30s)
- Client-side Negentropy sync support
Example Usage: Single relay
```typescript import { Relay } from "applesauce-relay";
// Connect to a relay const relay = new Relay("wss://relay.example.com");
// Create a REQ and subscribe to it relay .req({ kinds: [1], limit: 10, }) .subscribe((response) => { if (response === "EOSE") { console.log("End of stored events"); } else { console.log("Received event:", response); } }); ```
Example Usage: Relay pool
```typescript import { Relay, RelayPool } from "applesauce-relay";
// Create a pool with a custom relay const pool = new RelayPool();
// Create a REQ and subscribe to it pool .req(["wss://relay.damus.io", "wss://relay.snort.social"], { kinds: [1], limit: 10, }) .subscribe((response) => { if (response === "EOSE") { console.log("End of stored events on all relays"); } else { console.log("Received event:", response); } }); ```
Applesauce actions
Another new package is the
applesauce-actionspackage. This package provides a set of async operations for common Nostr actions.Actions are run against the events in the
EventStoreand use theEventFactoryto create new events to publish.Documentation: applesauce-actions
Example Usage:
```typescript import { ActionHub } from "applesauce-actions";
// An EventStore and EventFactory are required to use the ActionHub import { eventStore } from "./stores.ts"; import { eventFactory } from "./factories.ts";
// Custom publish logic const publish = async (event: NostrEvent) => { console.log("Publishing", event); await app.relayPool.publish(event, app.defaultRelays); };
// The
publishmethod is optional for the asyncrunmethod to work const hub = new ActionHub(eventStore, eventFactory, publish); ```Once an
ActionsHubis created, you can use therunorexecmethods to execute actions:```typescript import { FollowUser, MuteUser } from "applesauce-actions/actions";
// Follow fiatjaf await hub.run( FollowUser, "3bf0c63fcb93463407af97a5e5ee64fa883d107ef9e558472c4eb9aaaefa459d", );
// Or use the
execmethod with a custom publish method await hub .exec( MuteUser, "3bf0c63fcb93463407af97a5e5ee64fa883d107ef9e558472c4eb9aaaefa459d", ) .forEach((event) => { // NOTE: Don't publish this event because we never want to mute fiatjaf // pool.publish(['wss://pyramid.fiatjaf.com/'], event) }); ```There are a log more actions including some for working with NIP-51 lists (private and public), you can find them in the reference
Applesauce loaders
The
applesauce-loaderspackage has been updated to support any relay connection libraries and not justrx-nostr.Before:
```typescript import { ReplaceableLoader } from "applesauce-loaders"; import { createRxNostr } from "rx-nostr";
// Create a new rx-nostr instance const rxNostr = createRxNostr();
// Create a new replaceable loader const replaceableLoader = new ReplaceableLoader(rxNostr); ```
After:
```typescript
import { Observable } from "rxjs"; import { ReplaceableLoader, NostrRequest } from "applesauce-loaders"; import { SimplePool } from "nostr-tools";
// Create a new nostr-tools pool const pool = new SimplePool();
// Create a method that subscribes using nostr-tools and returns an observable function nostrRequest: NostrRequest = (relays, filters, id) => { return new Observable((subscriber) => { const sub = pool.subscribe(relays, filters, { onevent: (event) => { subscriber.next(event); }, onclose: () => subscriber.complete(), oneose: () => subscriber.complete(), });
return () => sub.close();}); };
// Create a new replaceable loader const replaceableLoader = new ReplaceableLoader(nostrRequest); ```
Of course you can still use rx-nostr if you want:
```typescript import { createRxNostr } from "rx-nostr";
// Create a new rx-nostr instance const rxNostr = createRxNostr();
// Create a method that subscribes using rx-nostr and returns an observable function nostrRequest( relays: string[], filters: Filter[], id?: string, ): Observable
{ // Create a new oneshot request so it will complete when EOSE is received const req = createRxOneshotReq({ filters, rxReqId: id }); return rxNostr .use(req, { on: { relays } }) .pipe(map((packet) => packet.event)); } // Create a new replaceable loader const replaceableLoader = new ReplaceableLoader(nostrRequest); ```
There where a few more changes, check out the changelog
Applesauce wallet
Its far from complete, but there is a new
applesauce-walletpackage that provides a actions and queries for working with NIP-60 wallets.Documentation: applesauce-wallet
Example Usage:
```typescript import { CreateWallet, UnlockWallet } from "applesauce-wallet/actions";
// Create a new NIP-60 wallet await hub.run(CreateWallet, ["wss://mint.example.com"], privateKey);
// Unlock wallet and associated tokens/history await hub.run(UnlockWallet, { tokens: true, history: true }); ```